

Universal Links. Sometimes just the term itself can give nightmares to those of you who spent countless hours setting up the AASA file on your web domains, configuring your ctasscode projects, and setting up your AppDelegate files to parse and handle every link that comes in (unless, of course, you let Branch handle your deep linking). This post does not teach you how to set up Universal Linking on iOS; instead, it will walk you through how to set up Xcode UI tests for clicking your links.
What is Xcode UI Testing?
With the release of Xcode 7 and iOS 9, Apple released an Xcode feature called User Interface Testing. This feature allows developers to interact with their phones or simulators programmatically. User interface testing is similar to unit testing in the sense that a developer creates a UI test target for a given app, which will create a UI test group and implementation file filled with an example testing function. In this tutorial, you will be learn how to implement UI tests that programmatically create and click Universal Links. To learn more, keep reading or request a Branch demo.
How to Properly Test Universal Links
If you are familiar with the behavior of Universal Links, you know that iOS can only open your app if the the user actually clicks on a link. In other words, typing the link into Safari or redirecting to the link automatically with javascript will not open the application. This can be incredibly frustrating to developers testing on a simulator. To properly simulate a link click, you must open up the simulator’s iMessage app, open up a chat, type the URL into the message bar, click the send button, click the message bubble that is created, and hope that the Universal Link opens up the app.
Fear not! There is now a better way to completely simulate this process.
Step 1: Create a UI Test
Open the Test Navigator:
![]()
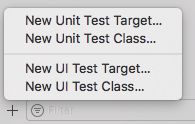
At the bottom of the navigator select the + button and select ‘New UI Test Target…’
Name the class whatever you like. It should give you a file tree that looks something like this.
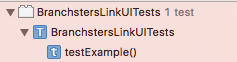
Open the file you just created and click on the diamond to the left of the class declaration.

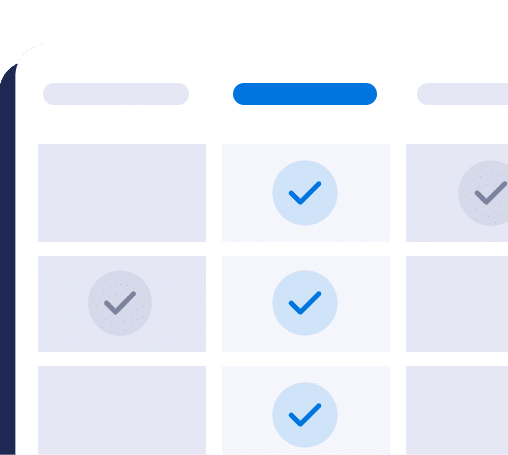
You’ll see your UI tests run on whichever device you are targeting. They should all show green checkmarks when they finish.
Step 2: Create iMessage Enum File
Next, we are going to create a set of functions that you can use to interact with the iMessage app on the simulator.
Create a new file in your [AppName]LinkUITests group and name it iMessage.swift. Paste in this code:
import Foundation
import XCTest

enum iMessage {

    static func launch() -> XCUIApplication {

        // Open iMessage App
        let messageApp = XCUIApplication(bundleIdentifier: "com.apple.MobileSMS")

        // Launch iMessage app
        messageApp.launch()

        // Wait some seconds for launch
        sleep(2)

        // Return application handle
        return messageApp
    }

    static func open(URLString urlString: String, inMessageApp app: XCUIApplication) {
        // Find Simulator Message
        app.cells.staticTexts["Kate Bell"].tap()

        // Tap message field
        app.textFields["iMessage"].tap()

        // Enter the URL string
        app.typeText(urlString)

        // Simulate sending link
        app.buttons["sendButton"].tap()

        // The first link on the page
        let messageBubble = app.cells.links["com.apple.messages.URLBalloonProvider"]
        messageBubble.tap()

        sleep(3)
    }
}
This code creates an enum called iMessage with a function called launch and an open URL function. When launch is called it will open up the iMessage application. When open(URLString:inMessageApp) is called with the parameters urlString and app, it should select the simulator message with Kate Bell, type the link into the iMessage field, click send, and click the link that is created by the message.
Step 3: Create Link Click Test
In this step, we will simulate clicking the link in iMessage by using the functions you created in the previous step.
Navigate back to the Test Navigator tab and click on your original test file. Create a new function:
func clickLinkWithMessage(link: String) {
       // Open iMessage app
       let messageApp = iMessage.launch()

       iMessage.open(URLString: link, inMessageApp: messageApp)

       //Reset the Message app
       messageApp.terminate()

       let app = XCUIApplication()
       XCTAssert(app.label == "Branchsters", "Could not open application with (link)")

       // Do some handling to ensure that this is the right page.

       sleep(2)

       app.terminate()


   }
This function creates and launches an iMessage app instance, calls the open function for the provided link on that iMessage app instance, and then runs a check to determine whether the app that was opened by the link was my “Branchsters” app. You can add more functionality or assertions after the app opens and deep links to the content.
Now, every time one of your tests calls this function, it should test clicking whatever link you pass in as a parameter. For example, in the testExample() function you can call this function on an array of links and test them all at once:
   func testExample() {

       let marketingLinks = [

                               "https://branchster.app.link/tPRFylffXG",

                               "https://branchster.app.link/UdfU8eacH"

                            ]

       for link in marketingLinks {

           clickLinkWithMessage(link: link)

       }

   }
There you go! Now you never have to manually enter a link into your simulator again.